|
Andy Caldwell:
Paul Zazarine is a freelance writer and the Senior contributing editor to Musclecar Enthusiast. He also has written many books about muscle cars (his speciality is Pontiacs). He takes pictures of all kinds of musclecars and gets the owner to contribute what they can to an Article (mainly info about the owner's history with the car). He then takes the pictures and articles and sells them to various publications. (MCE, Hi Performance Pontiac, Corvette Fever, Mopar Muscle, Car Collector Guide, etc.)
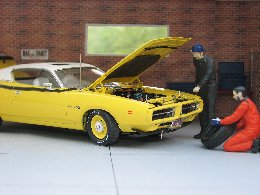
What was cool is my neighbor John last May said Paul was coming to Photograph his cars and he told Paul about my car and our other friend's AMX. He then for about 4 1/2 to 5 hours photographed them all that afternoon (I had no idea how long i would take!) Paul was a great guy and had lots of neat stories about muscle cars from back in the day. So in a way building the Super Bee model for him was a way for me to saying thanks.
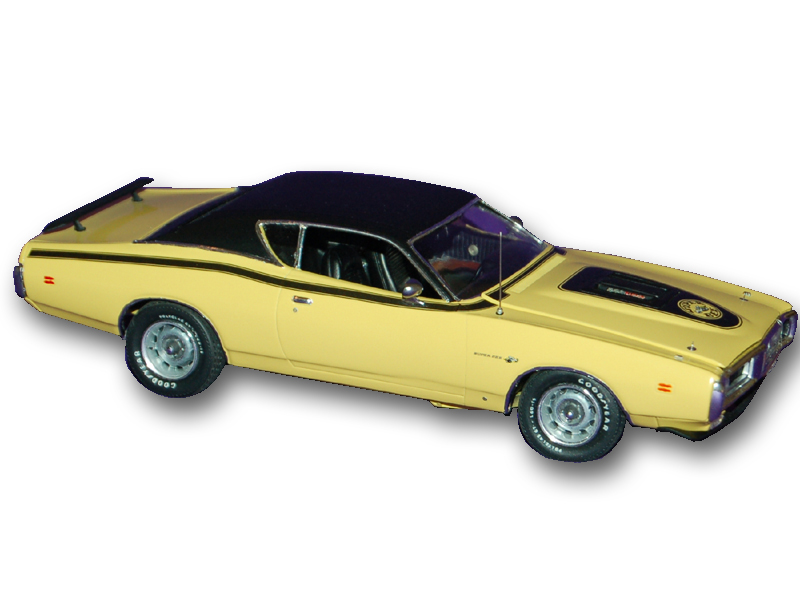
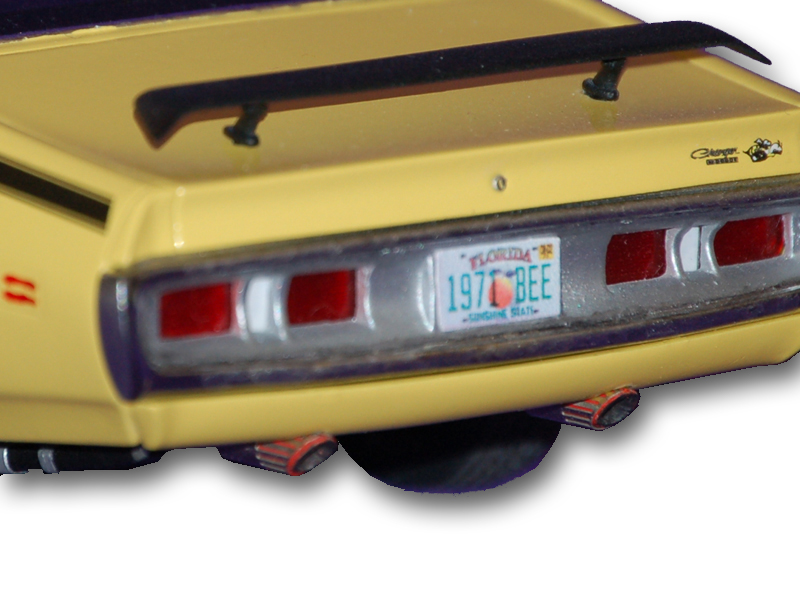
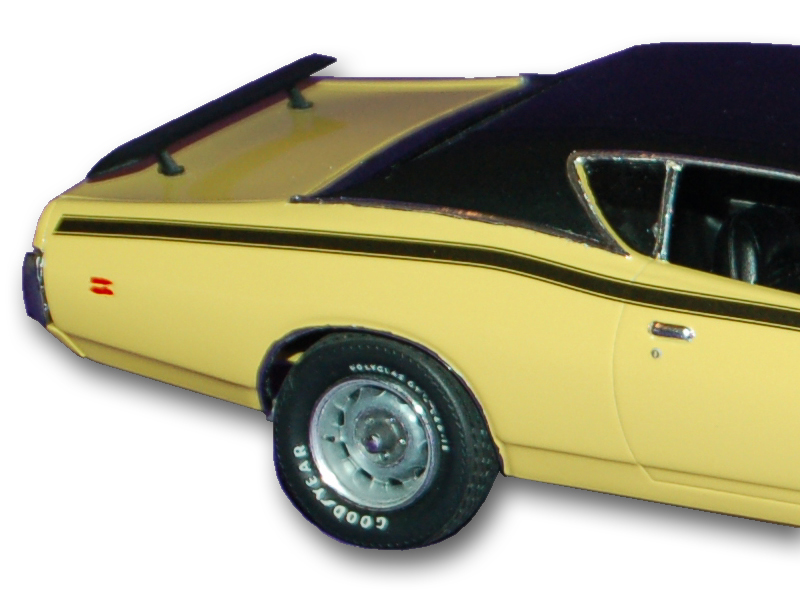
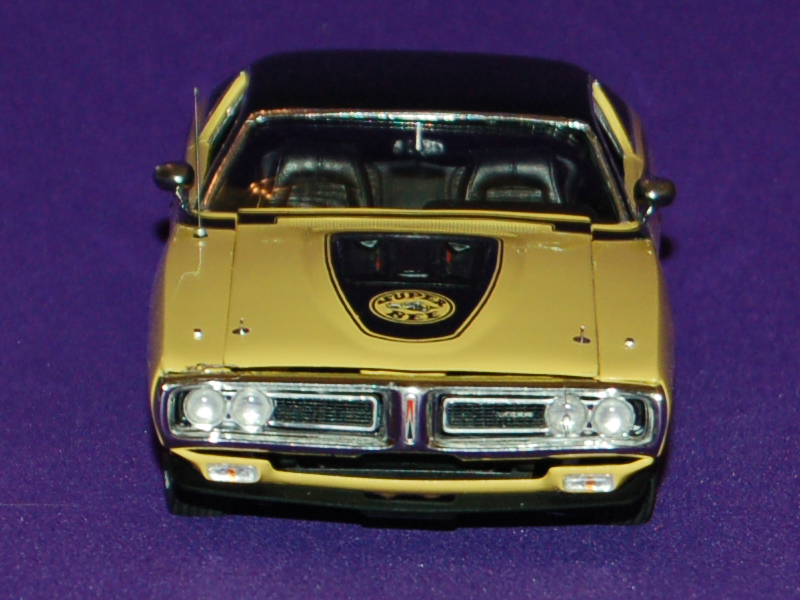
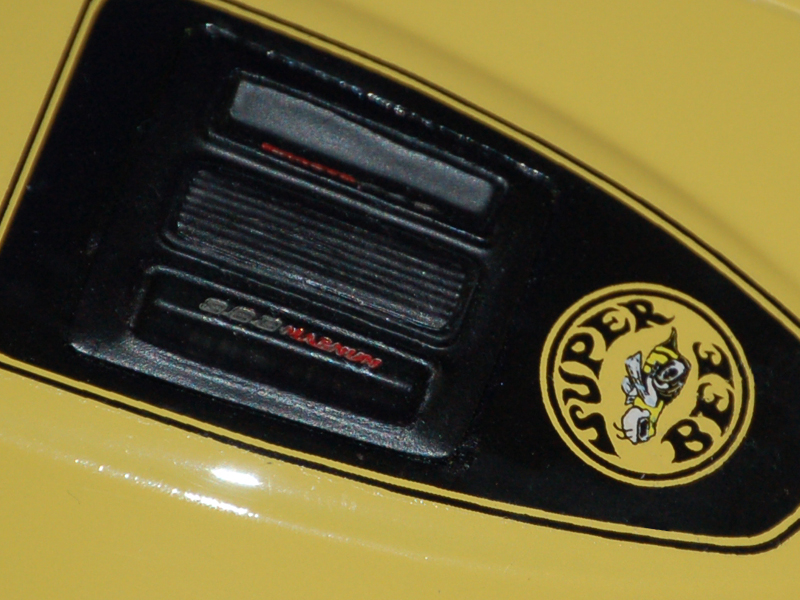
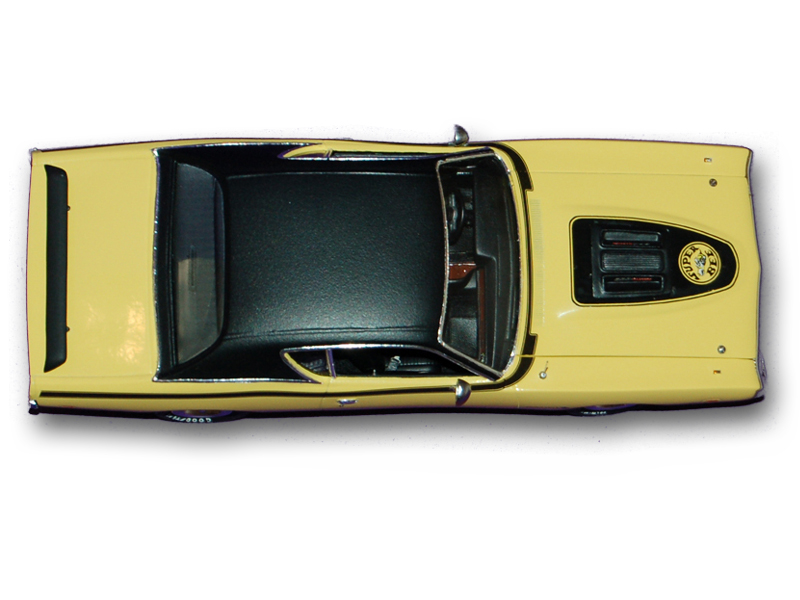
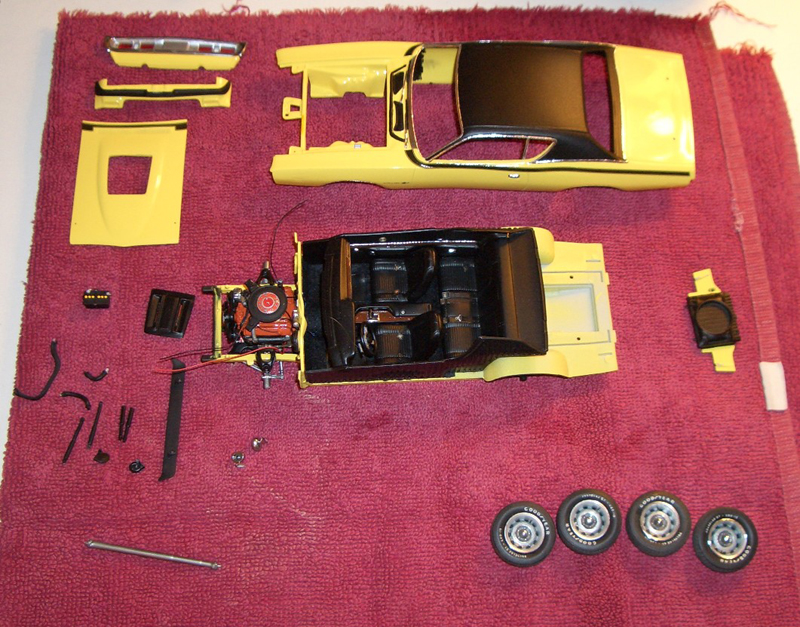
I completed the build of a replica of my neighbors '71 Super Bee. Thanks for the help from this forum (Scale Auto Magazine) in getting the parts I needed. I used alot of photoetched parts from the the model car garage, the auto console and tuff steering wheel, came from the monogram GTX kit. The Rallye wheels came from the monogram '71 Cuda. the tires are from an AMT '68 Roadrunner kit, and the resin tailpanel and hood insert are from AFX n scale and the decals are from Keith Marks. The vinyl was made from strip styrine painted with Krylon semi flat from a distance.
The interior I modified with power window switches, flocking, seat belts, tuff wheel and slap stick console from a monogram 71 GTX .
I made the power switches for the passenger and rear windows by filling down the window cranks flush with the interior panel until only the large end of the window crank was visible (it was circle shaped at this point). Then I squared that raised portion and bare metal foiled it.
On the drivers door the window crank is parallel to the interior floor.So I only filed the small and big ends of the window crank flush with the interior panel leaving a straight raised area which shaped like a rectangle, Then I used an xacto knife to divide the rectangle into 4 even squares. Then I foiled it...
Volia! a drivers window power window switch!
One other thing... As I would file away at the window cranks some of the detailing on the interior panels would need to be scribed back in. I did this with and X-acto knife.
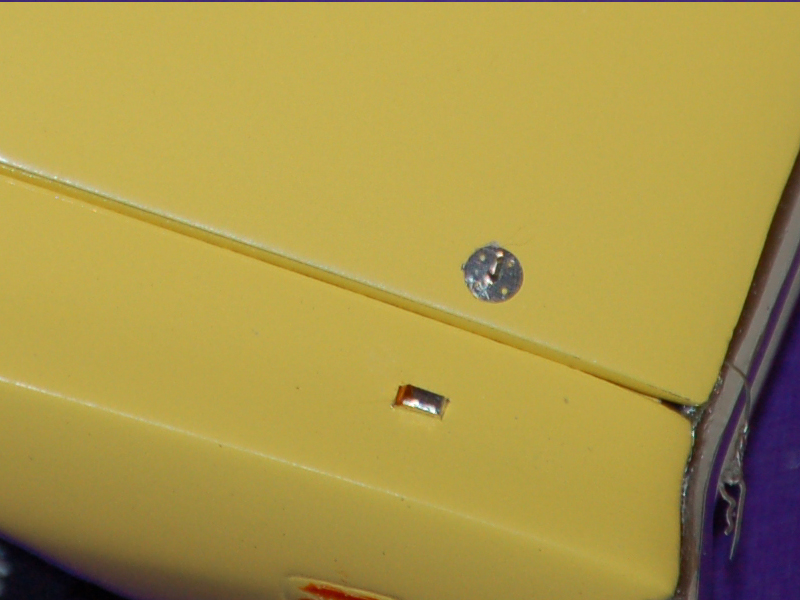
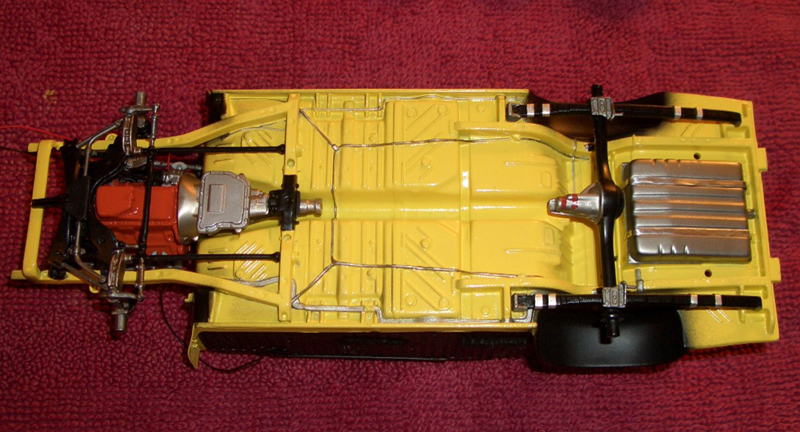
The underside which tried to reproduce overspray from undercoating in the wheelwells, rear end markings fuel tank straps from a wine bottle foil and paint detailing the brake and fuel lines.
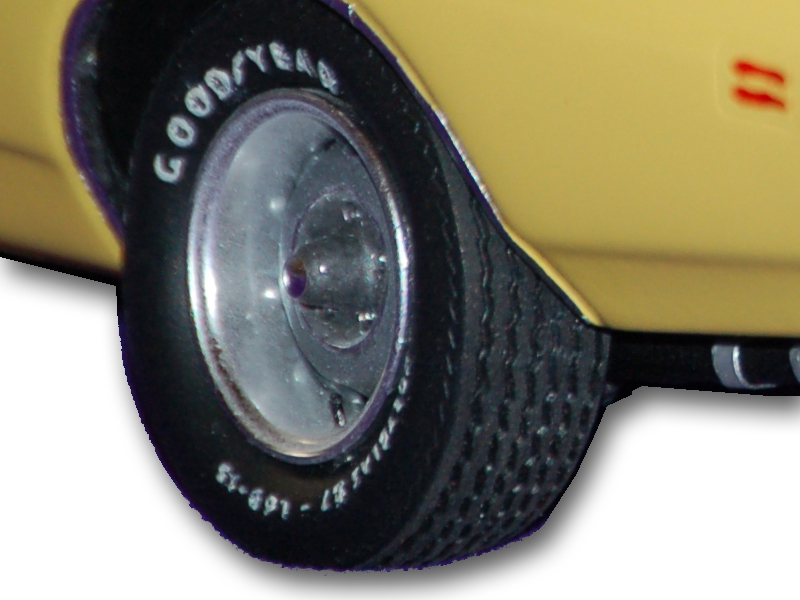
Modified rallye wheels from monogram Hemi Cuda kit. I sanded them from the backside until the the holes would show through (alot eaiser than painting them black) I brushed painted them with alclad aluminum, and magnesium in the center. The trim rings are coated with flat clear to replicate the brushed steel trim rings that were used in '71. The tires are from amt '68 RoadRunner lettered polly's with water based flat white and then the tires were coated with flat clear.
I did brush paint the wheels with alclad. It took some practice. I made sure whatever alclad color I was going to use was mixed throughly. I found if I would get the brush full of paint (a tiny 000 brush in this case) and very lighly touch the surface of the wheel with the brush, capilliary action would take place (with the paint running into the areas I needed paint to stick to. This worked alot better than trying brush the stuff on like you normally would It`s kinda like when you use a flat black wash on a chrome grill to bring out the detail. It's not perfect but it seemed to work for me.
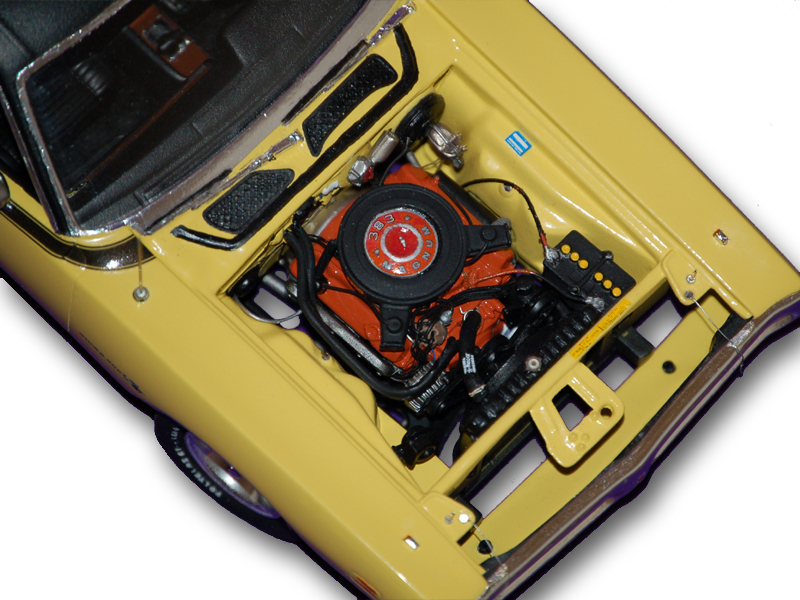
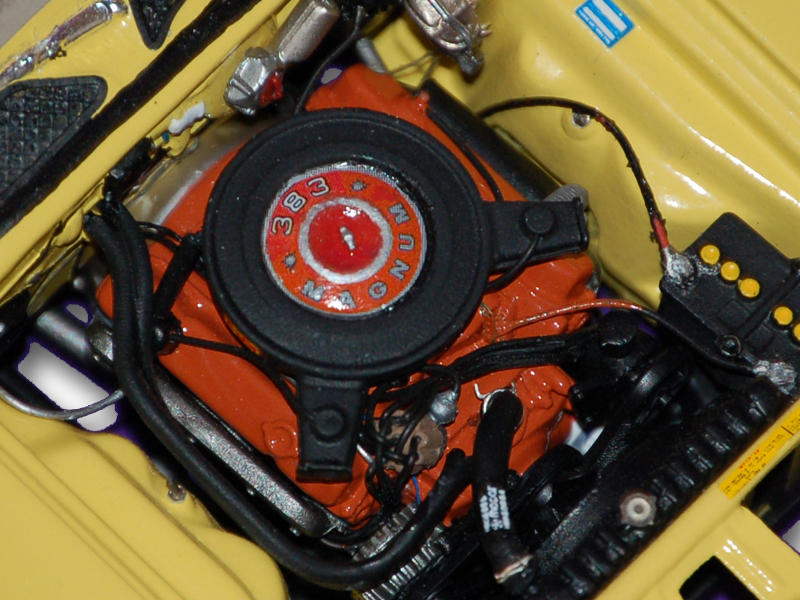
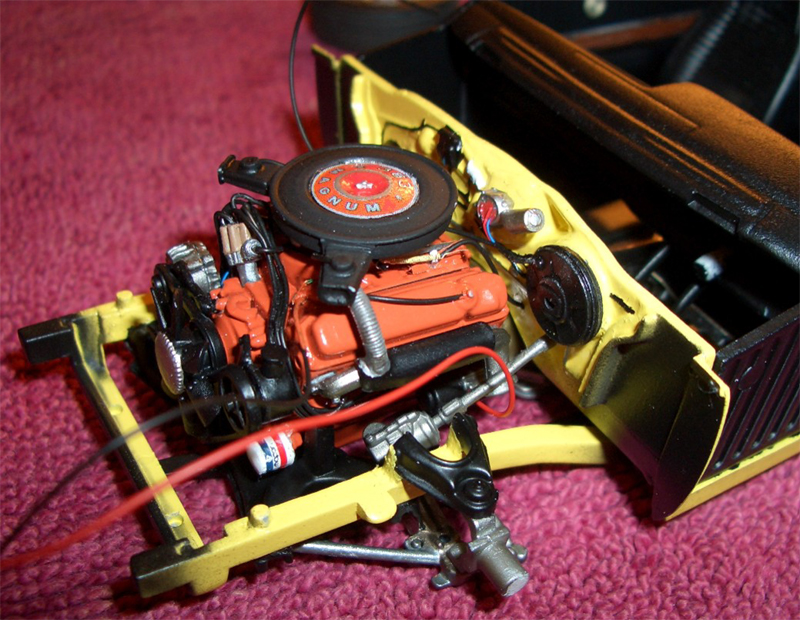
The 383 engine shot which I wired and added carb/trans kickdown linkage, springs, vacuum/fuel lines, an altinator from revell '69 Charger and decals from the last detail.
It will be a while before and if I build the green one as I had this one sitting around for a year and half. I just needed the proper motivation as I started back up on it at christmas and finished the late January.
I have driven the yellow one but not the green one yet. I also have disassembled, rebuilt and tuned the carburetors and distributors for both cars (I learned this when I worked in a speed shop for 2 years while I was going thru college.)
Andy
|